
 Embrace your child’s wonder of the magical world of fairies by building the perfect size landscape for their imaginary friends.
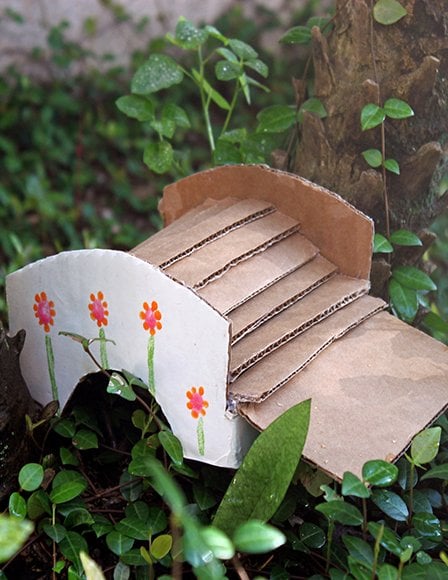
This bridge is made using found items from the recycling bin. While parents will need to help the kiddos with some of the cutting and gluing, children will have a blast decorating the bridge, adding a watercolor river that flows underneath and collecting rocks and other items from the garden to bring their fairy bridge to life.
What you will need:
- Scissors
- Pencil
- Corrugated cardboard
- Craft knife
- Eco-friendly paints
- Glue gun
Make your fairy bridge:
- Cut the top and bottom off of a small box.
- Use a pencil to draw the curve of a bridge on 2 of the opposite sides of the box.
- Use the craft knife (adult’s only) to cut the top section above the curve off of both of those sides.
- Then, cut the other two sides of the box completely off.
- Cut the leftover pieces of cardboard into the slates for the bridge’s floor.
- Then, glue the slates across the bridge overlapping them as you go.
- Use the craft knife to cut a circular shape under the bottom of the bridge on both sides.
- Now your child can use eco-friendly paints, markers or crayons to decorate the bridge.

Jennie Lyon is the owner of Sweet Greens, an award-winning green lifestyle blog. She posts on simple, fun ways families can go green together. Jennie writes green parenting, children’s how-to projects and green design posts at Inhabitots, and contributes to Cascadian Farm, Applegate and is a member of Target’s Inner Circle as well as a Stonyfield Yo-Getters Ambassador.
The post DIY Magical Fairy Bridge appeared first on Green Child Magazine.